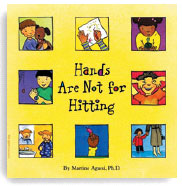
 Hands Are Not for Hitting
by Martine AgassiFree Spirit Publishing, Inc.
Hands Are Not for Hitting is a story about alternative actions and activities that children and adults can do with their hands instead of hitting. It teaches correct use of hands in an encouraging way through the use of simple language and descriptive illustrations that makes learning fun. The story helps children understand why they may feel like hitting and offers many ways one can deal with feelings by replacing the use of hitting with alternative skills. Suggested alternatives to hitting are: use of feeling words, ways of letting your feeling out in a non-violet manner, problem-solving, trying to understand how others might feel when you hit, and how to use one’s hands appropriately. At the end of the story there are many supplemental ideas for parents and teachers to support the reading of this story and to reinforce children’s understanding of using hands in an appropriate manner. This book is available in a simpler board book version for children who are developmentally younger.
Examples of Activities:
While reading the story, demonstrate the suggestions throughout the book: handshaking, clapping, blowing kisses, pointing, etc. Children can practice what we can do with our hands.
While reading the story, have children talk about how they might feel when someone hits them. Help them problem solve by coming up with solutions of what they can do instead of hitting. Write feelings and solutions on a chart.
Give children several scenarios and play a game of “What could you do instead of hitting?” Examples below:
Someone took the car you were playing with. What could you do?
Someone knocked your blocks down. What could you do?
Someone bumped into you in line. What could you do?
You want to be first in line. What could you do?|
Someone picked up your beads and they fell off the string. What could you do?
Use a popsicle stick with “stop” on one side and “go” on the other. Give children a variety of situations and ask them if they should “stop or go”. Examples below”
The girl helps her friend pull a wagon.
The boy hits his mom.
The girl rams her trike into the trike in front of her.
The boy hugs her friend.
Have the children make a “helping hands” chain. Trace and cut out multiple hands for each child. Place them in a pocket or baggy that is easily accessible. Catch children using their hands to help others or to be a friend. As you recognize a child’s helping hand behavior, have the child get a hand from their pocket and connect it to the class’s “helping hand” chain. The hands can be placed on the wall to wrap around the room, or in the hall to link with a neighboring class. On a regular basis, celebrate how long the helping hand chain is getting!
As a story review, ask the children “What can you do with your hands?” As the children’s answer, write or draw a picture to make a class list of “what our hands can do.” The children can also demonstrate what their hands can do and you can take photographs of the children in action. The photographs can be added to the class list and posted.
Repetition of the same book allows children a chance to really learn the story – it becomes their story by the end of the week! Repetition helps children feel confident and competent as they become able to talk about the story, predict what will happen next, recognize and understand certain words, talk about their own experiences related to the story, and even make up their own story! Based on this idea, try reading Hands Are Not For Hitting every day for several days during the week and emphasize a different concept, word or idea from the book each day. Continue to build on the concept with related activities in small group/center time. An example is included below:
Idea of the Day: How We Use Our Hands to "Talk"
Introduce the concept of the day by having the children think about the many different ways we use our hands to talk. Recall from the story the ways our hands can talk: hands wave hello and goodbye, hands shake when meeting, hands draw and write, they gesture “come here” and they point, clap, count, hug, give high-fives, make a promise… Discuss how we can also talk with our hands using sign language. Demonstrate a few simple signs or show photographs and have the children imitate the signs. Encourage the children to try to use signs throughout the day to request “food”, “all done” or “more”
Art: Children can do this activity with a friend. Have paper and crayons/markers available along with scissors, popsicle sticks and tape. Each child makes the sign for “I love you” and places their hand on the paper as the other child traces their hand (tape the paper to the table to stabilize it and make it easier to trace). Children can then decorate their “I live you” sign, cut it out, and glue it to the popsicle stick. Talk to the children about how they can use their “I love you” sign to tell people that they are special. Ask the children how it makes them feel when someone tells them that they love them. The stick can be used in large or small group while singing the “Skinamarinky Dinky Dink” song (see music activity).
Music: Sing and use gestures top the song “Skinamarinky Dinky Dink”: Skinamarinky dink, Skinamarinky doo, I love you. Skinamarinky dinky dink, Skinamarinky doo, I love you. I love you in the morning, and in the afternoon. I love you in the evening, and underneath the moon. Skinamarinky dink, Skinamarinky doo…I LOVE YOU (I really mean it), I love you too!
Make-Believe: teach the children how to make shadow puppets. You can build a tent in the classroom and have children go in the tent with flashlights. One child can make a shadow puppet and the other children shine their flashlights on the shadow puppet so that the shadow is displayed on the wall or the side of the tent. Children can take turns making up stories go with their shadow puppets. Discuss how sometimes shadows can be scary and sometimes they are really funny.
Idea of the Day: How We Use Our Hands to Make Music
Introduce the concept of the day by asking children if they remember how our hands can make music. Review in the story the page about playing a song on an instrument like a guitar or drum, snapping, clapping, shaking, tapping. Have them give it a try! Have the children sit in a circle and choose an instrument to play. Talk about how the music makes them feel. Some music sounds sad or calming, while other music might make you excited or happy. Everyone can sing familiar songs as they play their instruments.
Art: Make drums out of a variety of empty containers with lids. Provide a variety of art materials (paints, papers, glues, glitter, beads, feathers, noodles, rice, etc..) and have children create drums. Compare the differences in the sounds they make. Children can use their hands, sticks, spoons, or dowels as drumsticks. Adapt the drumsticks by adding cotton or cloth to hear the different sounds it makes.
Music/Movement: Take photographs of your special instruments. Place the photographs onto a cube shaped box. Have the instruments and the cube with the instrument choices available in the music area. Children can take turns rolling the cube die to see what instrument to play. Others can join in by dancing or singing or rolling the die to play different instruments.
Science: Give children several objects/items that will produce sounds (conch shells, tuning pitch fork, 2 metal spoons rubber banded together so the spoons are back to back, rubber bands around empty shoe boxes, drums from art project (above), sand paper glued to blocks, etc. Encourage children to explore the different sounds and textures. Make a chart of which objects make loud/soft sounds, etc.
Idea of the Day: How We Use Our Hands to Take Care of Ourselves
Introduce the concept of the day by reviewing the pages of the book that talk about dressing, eating, drinking, washing, combing hair, brushing teeth, turning off the lights at bedtime, buckling up in the car, cleaning up spills, putting on a helmet, putting a band aide on a boo boo, etc… Sing the following song to the tune of “The Farmer in the Dell” and do hand motions:
My hands help me eat. My hands help me eat. My hands help me to eat my food; my hands help me eat.
My hands help me dress. My hands help me dress. My hands put on my clothes and shoes; my hands help me dress.
My hands help me eat. My hands help me eat. My hands help me to eat my food; my hands help me eat.
My hands help me wash. My hands help me wash. My hands help me wash myself; my hands help me wash.
My hands help me comb. My hands help me comb. My hands help me comb my hair; my hands help me comb.
My hands help me brush. My hands help me brush. My hands help me brush my teeth; my hands help me brush.
My hands help me turn out the light. My hands help me turn out the light. My hands help me turn out the light – good night; my hands help me turn out the light.
My hands help me buckle up. My hands help me buckle up. My hands help me buckle up seat belts; my hands help me buckle up.
My hands help me clean my spills. My hands help me clean my spills. My hands help me clean my spills and mess; my hands help me clean my spills.
Make–Believe: Encourage the children to play mommy and daddy and teach a toy baby to take care of himself/herself (washing, dressing, feeding, taking care of boo boos, combing hair, burping, rocking, etc… What would they say to teach their baby? How would they teach their baby? How do they think it makes the baby feel when they teach him to take care of himself?
Water Table: Put water in the water table, either in the classroom or outside on the playground. You might even add bubble bath soap! Children can wash plastic dolls in the “tub”. If you have access to several baby tubs you could also use those instead of the water table. Provide a variety of objects for children to play with: empty shampoo bottles, wash clothes, small bars of soap, rubber duckies or other small bath toys, and small cups for rinsing. Once children have washed their babies, they can dry and dress them. Play can be extended by ‘reading” a book to their baby and tucking them in bed! Talk about feelings and how they like bath time.
Idea of the Day: How Our Hands Work Together
Introduce the idea for the day by using the activity at the end of the book on page 33—“Cooperating Hands”. The activity stresses how our hands work together as a pair and when one is missing or being used it makes it harder for us to do such things as building blocks and coloring. It also builds on the idea that if you work with a friend, you have more hands to create and build!
Music/Movement: Sing and play “Row Row Row Your Boat” – have each child sit facing another child, sitting feet to feet. Have the children connect hands and rock back and forth while holding hands and singing the song.
Snack: Give children a snack that is not too messy and can be served on a paper plate. Have the children try to eat their snack with their hands behind their back! This one is sure to cause a lot of giggles!
Art: Have the children go to easel painting in pairs. Tie the paint brushes together so that they can create a painting together. Talk about how it makes them feel to try to paint a picture together (happy, silly, frustrated, mad, etc…)
Math: How many hands? Have children measure the size of the objects in the classroom by working in teams to count “how many hands high/long” the object is. How many hands across a door? How many hands across a table? How many hands high is the chair? Record their measurements, then discuss what is the tallest, longest, etc.. While the children are measuring objects, talk about all the different ways they are using their hands.
Idea of the Day: How Hands Are Not for Hitting
Introduce the idea of the day by talking about how all week you have talked about all the different ways you can use your hands. Briefly review the activities that the children have done during the week and discuss how it made them feel. Tell then that today you are going to talk about how Hands are NOT for Hitting. Discuss the things you can do with your hands instead of hitting. Write these on chart paper as children generate ideas. Read the story about Tucker Turtle found on the CSEFEL website (Tucker Turtle Takes Time to Tuck and Think). When Tucker is angry, he knows how to stop and tuck into his shell and take three deep breaths. He then thinks, thinks, thinks, and comes up with great ideas about what he can do with his hands instead of hitting. Talk a bout what it feels like when we are angry. Our heart might beat faster, we might get red in the face, our bodies might get tight, and we might even feel “hot”. Discuss how if we do what Tucker did we can calm ourselves down and think of other things to do with our hands. Discuss what it feels like to be calm. Demonstrate taking three deep breaths, cooling off and calming down. Describe how you become looser like a Raggedy Ann doll. Also, point out how you can wiggle your fingers, your breath is smoother, your heart beats slower, your neck and shoulders are loose and you can even smile! Physically demonstrate and have the children practice being both angry and calm.
Art: Make a “Tucker the Turtle Puppet”. Using the turtle pattern on the CSEFEL website and paper plates, have children make a puppet. They can paint/decorate the “shells” of their turtle. They can also use the turtles in large or small group to practice the turtle technique.
Make-Believe: Take a large sheet and have children pretend it is a big turtle shell. Have the children go under the shell and practice taking 3 deep breaths before they come out of the shell. Play a game where you give the children a situation, such as Tucker just got hit in the head with a ball – get the children to go under the “shell” take 3 deep breaths and then come out and talk about what Tucker could do instead of hitting. Make a chart that you can leave up as a reminder to the children of all the things you can do instead of hitting!
Extend to Home: Print out the pictures of the turtle technique from the CSEFEL website and have children take the pictures home to color or paint and talk about “Tucker Turtle” with their families. Send a note home to the families telling them about the Turtle technique and suggestions for how they can help their child practice the technique at home.
We welcome your feedback on Book Nook. Please go to the CSEFEL Web site (http://csefel.uiuc.edu) or call us at (217) 333-4123 to offer suggestions.


College of Education
Early Childhood and Parenting Collaborative
CSEFEL is located at the University of Illinois at Urbana-Champaign
Children's Research Center; 51 Gerty Drive; Champaign, IL 61820
Phone: (217) 333-4123 or (877) 275-3227; Fax: (217) 244-7732
CSEFEL Web Address: http://csefel.uiuc.edu; Send comments to the CSEFEL Webmaster.